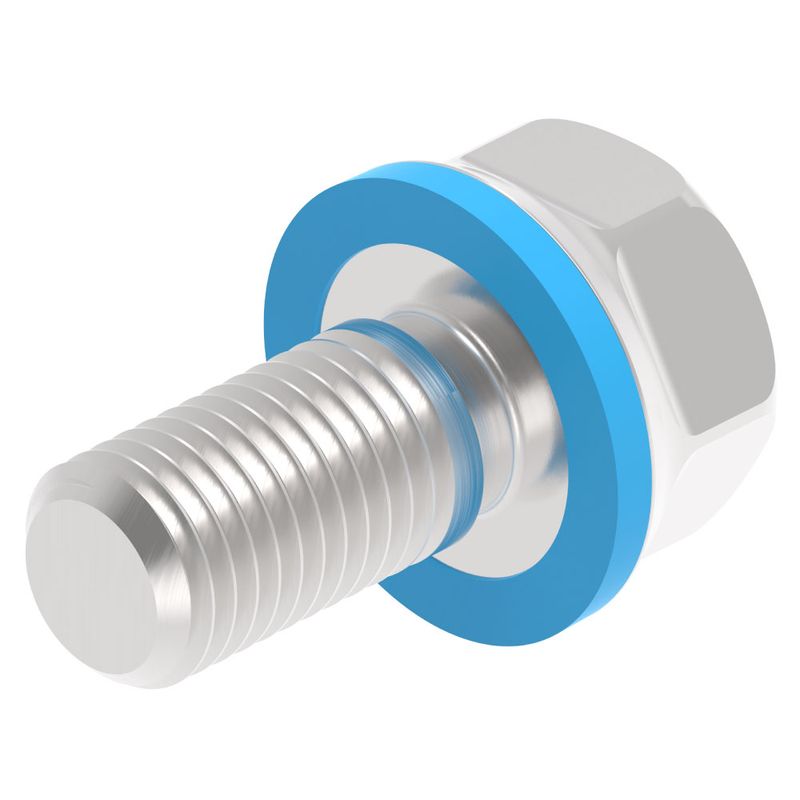
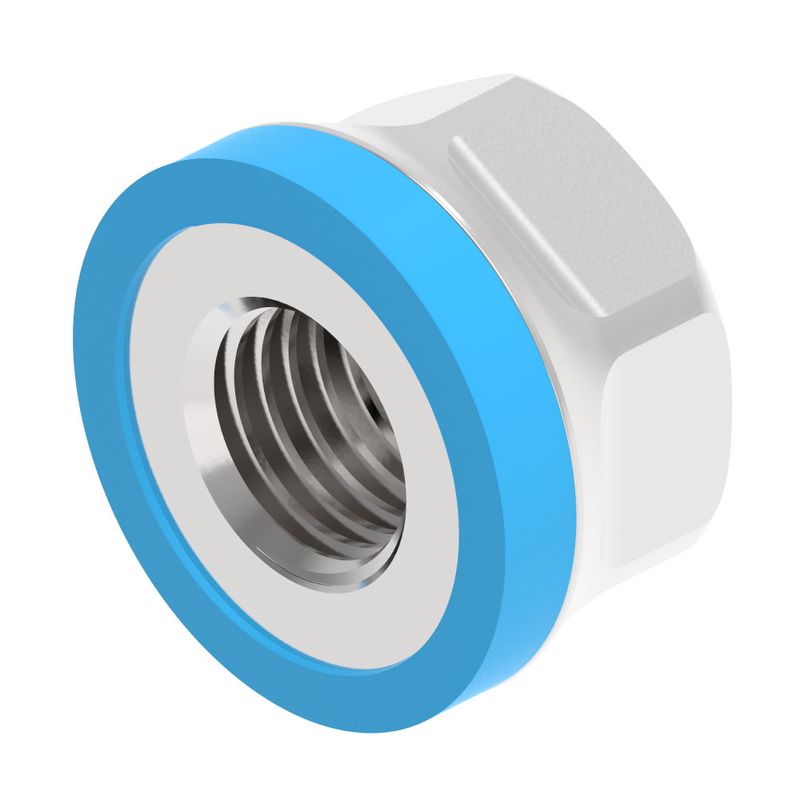
How to Use Nuts, Bolts and Washers in Industrial Assembly
A loose panel that rattles louder every week. A nut that backs itself off a running motor mount in a matter of months. A washer crushed flat under a bolt head that should have distributed load, not concentrated it. None of these failures happen because someone forgot what a nut, bolt or washer is. They happen because the stacking order, the thread match, the grade, the torque, or the operating environment was treated as an afterthought rather than a decision.
At ForndLock, we manufacture and supply nuts, bolts and washers for equipment builders, and the question we get most often isn't "what is a washer for" — it's "why did this joint fail when everything looked correctly assembled." Usually the answer sits in one of a handful of places: the wrong washer on the wrong side, a mismatched thread pitch that nobody caught until the nut wouldn't seat cleanly, or a torque value applied without accounting for friction and coating.
This guide walks through how to use nuts, bolts and washers in industrial assembly the way we approach it in our own engineering conversations — starting with what each part actually does, then moving through stacking order, matching logic, washer selection, step-by-step installation, torque and preload, loosening prevention, material compatibility, common mistakes, and maintenance. Toward the end, we cover where these fasteners actually get used across different equipment types, and how to work with us if you need a custom nut, bolt or washer built to a specification rather than pulled off a generic shelf.
What Do Nuts, Bolts and Washers Actually Do?
A bolt creates clamping force through controlled stretch, a nut holds that stretch in place, and a washer protects the surrounding surface and spreads the load — each part fails the joint differently if misunderstood.

It's tempting to think of a bolt as a pin that simply occupies a hole and holds two parts from sliding apart. That's not how a bolted joint works. The bolt is closer to a stiff spring than a rigid pin — it stretches by a very small, controlled amount as it's tightened, and that stored tension is the actual clamping mechanism. The nut's job is to lock that stretch in place so the tension doesn't relax over time. The washer's job is neither to stretch nor to lock, in most cases — it's there to protect the surface underneath and spread the bearing load over a wider area than the nut or bolt head alone would cover.
Component | Primary Function | What Happens If Misused |
Bolt | Generates clamping force via controlled elongation | Under-tension → joint slip; over-tension → yield/thread damage |
Nut | Holds thread engagement and maintains clamp | Wrong grade → strips or fails before bolt does |
Washer | Distributes load, protects surface, may aid locking | Wrong type → false sense of anti-loosening security |
In our manufacturing and application experience, we often see joints fail not because the bolt broke, but because the assembler treated it as a pin rather than a tensioned spring. Once you accept that framing, decisions about stacking order, torque and locking method start to make a lot more sense.
What Does a Bolt Do in a Joint?
A bolt clamps parts together by stretching slightly as it is tightened, and that stored tension — not the shank sitting in the hole — is what holds the joint closed.
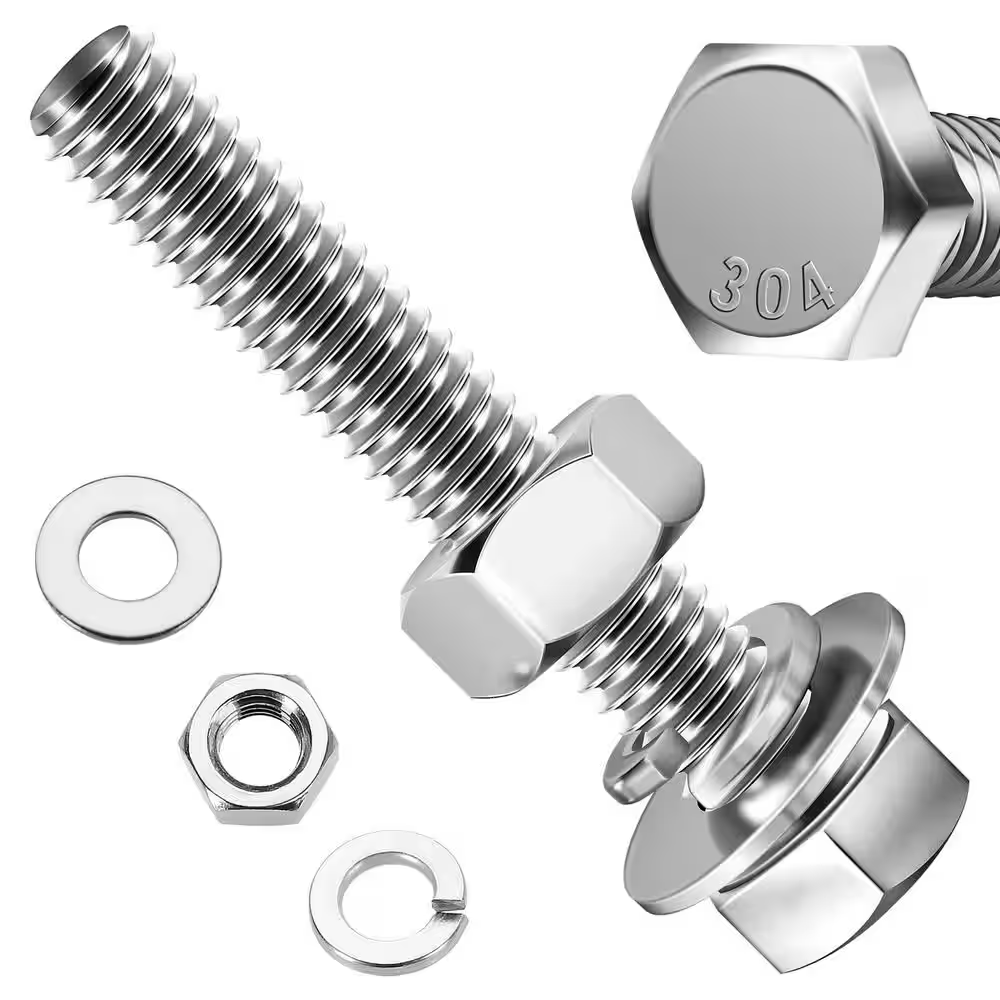
A bolt either passes fully through the joined parts and mates with a nut on the far side, or it threads directly into a tapped hole in one of the components. As it's tightened, the bolt elongates by a small, elastic amount — this elongation is called preload. That preload converts directly into clamp force pressing the joined materials together. The joint stays closed as long as that clamp force exceeds the forces trying to separate the parts, whether that's static load, vibration, or thermal movement.
What Does a Nut Do Once Tightened?
A nut engages the bolt's external threads and locks the bolt's tension in place, and different nut styles exist because different joints need different removal, space or locking behavior.

A standard hex nut is the general-purpose choice for most bolted connections. A flange nut integrates a wider bearing surface, which can reduce or eliminate the need for a separate flat washer underneath it. A lock nut — whether a nylon-insert type or an all-metal prevailing-torque design — adds resistance against self-loosening. A cap nut covers the exposed bolt end for appearance or safety reasons. A wing nut trades locking strength for tool-free hand tightening, which limits it to low-load, frequently adjusted joints.
What Does a Washer Do in an Assembly?
A washer's core jobs are spreading bearing pressure, protecting the mating surface and bridging oversized holes — locking is a secondary function that only certain washer designs actually provide.

A standard flat washer is not a locking device. That's worth stating plainly because it's one of the more common assumptions we run into. Its primary roles are load distribution across the bearing surface, protecting the base material from being marred or embedded during tightening, and bridging holes that are larger than the bolt diameter. Certain washer designs also contribute sealing, electrical insulation, spring-loaded preload compensation, or — in specific geometries — locking assistance. But that locking behavior comes from the design, not from the fact that it's a washer.
What Is the Correct Order for Nuts, Bolts and Washers?
The common stacking order is bolt head → flat washer → joined materials → flat washer → nut, but this is a typical pattern, not a universal rule — the right order depends on surface material, hole size, load and design.
That sequence works as a reasonable default for a general bolted connection through two flat components. But treating it as a fixed rule causes problems in practice. Flange bolts and flange nuts already integrate a wide bearing surface into the fastener head or nut face, which can remove the need for a separate loose washer on that side entirely. The more useful principle, and the one worth remembering above any fixed sequence, is this: protect whichever side is actually rotating during tightening, since that's the surface exposed to spinning friction.
Should the Washer Sit Under the Nut?
The washer generally goes under the nut when the nut is the side being rotated to tighten, so it protects the surface from spinning friction and spreads the clamping load.
If the bolt head is held stationary with a wrench while the nut is turned to draw up the joint, the nut side experiences the rotational friction. That's the side that needs the washer's protection.
Should the Washer Sit Under the Bolt Head?
The washer belongs under the bolt head whenever the bolt head is the rotating side, the hole is oversized, the surface is soft or coated, or extra bearing area is needed.
This is the mirror case — if you're driving the bolt head with a socket while the nut stays fixed, the bolt-head side takes the rotational wear. It also applies regardless of rotation direction when the clearance hole is larger than ideal, the base material is soft aluminum or coated sheet, or you simply need more bearing area than the bolt head alone provides.
Do You Need Washers on Both Sides?
Washers are needed on both sides when both faces are soft, coated, slotted or oversized relative to the fastener, while a single washer is usually enough when only one side rotates or needs protection.
If both mating surfaces are vulnerable — thin sheet metal on one side and a slotted mounting hole on the other, for example — a washer on each face is the sound choice. When only one surface is at risk or only one component rotates, a single washer on that side is typically sufficient. Flange-head fasteners can sometimes eliminate the need for a loose washer altogether, since the integrated bearing surface already does that job.
Where Should a Lock Washer Go?
A lock washer should sit directly against the component that rotates during tightening, and its exact position depends on how that specific locking design generates resistance.
A split or spring lock washer works by compressing slightly and pushing back against the rotating face, so it needs direct contact with whichever part turns. A toothed washer works differently — through increased friction from serrated edges digging into the mating surface — so it's typically installed without a flat washer underneath it, again against the rotating element. What we'd caution against is treating any spring or split washer as a universal fix for high-vibration assemblies. These designs have real limitations, and in genuinely demanding vibration environments, they're often better paired with — or replaced by — a locking method matched more specifically to the loading condition.
How Do You Match Nuts, Bolts and Washers Correctly?
Matching fasteners correctly means aligning nominal diameter, thread pitch and standard, strength grade, and washer dimensions together — matching diameter alone is one of the most common causes of thread damage we see.

Why Must the Nominal Diameter Match?
The nut's nominal diameter has to equal the bolt's nominal diameter, whether in metric or inch sizing, or the threads simply will not engage properly.
An M6 bolt requires an M6 nut. A 1/4-inch bolt requires a 1/4-inch nut. That much is intuitive. But diameter matching is only the first checkpoint, not the last one.
Why Does Thread Pitch and Standard Matter?
Two fasteners can share the same diameter and still be incompatible if their thread pitch or standard — metric, UNC, or UNF — doesn't match, which is what causes cross-threading and galling.
Here's where a lot of avoidable damage happens. A metric bolt and an inch-standard nut can look deceptively similar side by side, but their thread forms won't mesh correctly. Force them together and the threads either bind partway, or worse, they seem to start engaging and then jam and gall as the mismatch compounds turn by turn. Coarse threads generally hold up better under vibration and are more forgiving of minor debris or damage, since there's more material per thread engagement. Fine threads offer a smoother, more precise fit and slightly higher tensile strength for a given diameter, but they're more sensitive to cross-threading and tend to need cleaner conditions to assemble reliably. Choosing between coarse and fine pitch, then, comes down to whether the joint's priority is vibration resistance or assembly precision.
How Should Strength Grades Be Matched?
A bolt's strength grade needs a nut and washer rated to handle the same clamping load, because a high-grade bolt paired with a low-grade nut only performs as well as its weakest component.
If a bolt is rated for a certain proof load but the nut it's paired with is a lower grade, the connection's real strength drops to whatever the nut can handle before it strips or deforms. We recommend verifying grade compatibility against the applicable specification or engineering drawing for the joint in question, rather than relying on a generic pairing chart — the correct combination depends on the application's load case, and we'd rather point you toward the governing specification than offer an oversimplified rule.
How Do You Select Correct Washer Dimensions?
The right washer is chosen by inside diameter clearance, outside diameter for bearing area, thickness, and hardness relative to the bolt's clamping load.
The inside diameter needs enough clearance to slip over the bolt shank without binding, but not so much clearance that the washer can shift off-center under load. The outside diameter determines how much bearing area you get — important when the base material is soft or the hole is oversized. Thickness affects how much the washer compresses or deforms under clamping force, and hardness needs to be appropriate for the load; a washer that's too soft for a high-preload joint can crush and lose its bearing function entirely.
How Do You Choose the Right Washer Type?
The right washer type depends on whether the joint needs more bearing area, a seal, electrical isolation, spring-loaded preload retention, or simple surface protection — no single washer covers all four needs.
Before reaching for a table, it helps to ask what the joint is actually being asked to do. A joint through thin, soft sheet metal needs bearing area more than anything else. An enclosure exposed to washdown or weather needs a seal. An assembly joining dissimilar metals, or one near sensitive electronics, needs isolation. A connection subject to thermal cycling or moderate vibration benefits from a washer that maintains spring-loaded contact even as the joint settles slightly over time.
Washer Type | Main Function | Suitable Application | Key Limitation |
Flat Washer | Load distribution, surface protection | General bolted joints | No inherent locking function |
Fender Washer | Wide bearing area over large/soft surfaces | Sheet metal, soft substrates | Thin gauge, limited load capacity |
Sealing Washer | Prevents fluid/gas leak at fastener | Enclosures, tanks, panels | Sensitive to temperature and chemical exposure |
Spring Washer | Maintains elastic preload | Moderate vibration joints | Not a substitute for correct torque |
Tooth Washer | Increases friction via serrations | Electrical bonding, light-duty locking | Can mar coated or finished surfaces |
Belleville Washer | Sustains preload through thermal/load cycling | Temperature-variable joints | Requires correct orientation and stacking |
Insulating Washer | Electrical/galvanic isolation | Dissimilar metal or electrical assemblies | Adds compliance, may reduce clamp stiffness |
Our engineering team evaluates washer geometry against the joint's bearing surface and load path before recommending a stack-up, rather than defaulting to a standard flat washer across every assembly. Defaulting to one washer type across a whole product line is a common shortcut, and it's usually the reason a specific joint underperforms even though every other joint on the same equipment is fine. If you're working through a specific washer selection question, sending the relevant drawing to [email protected] is a reasonable way to get a second opinion on the stack-up before you commit to volume production.
How Do You Install Nuts, Bolts and Washers Step by Step?
Correct installation means inspecting the fasteners, confirming hole alignment, stacking components in the right order, starting the nut by hand, tightening with a controlled tool to the specified torque, and inspecting the finished joint.
Step 1 — How Do You Inspect Fasteners First?
Before installation, every fastener should be checked for thread damage, rust, burrs, cracks, deformation, contamination and grade markings, since a damaged part can compromise the whole joint regardless of correct torque.
This step gets skipped more often than it should, particularly on high-volume assembly lines where fasteners are handled in bulk. A single damaged thread or an unnoticed hairline crack undermines everything that follows, no matter how precisely the torque is applied afterward.
Step 2 — How Do You Check Hole Alignment?
Misaligned holes should never be forced together with a bolt, because the bolt then carries unintended bending and shear stress instead of pure tension.
A bolt is designed primarily to handle tensile load along its axis. Forcing it through misaligned holes introduces bending and shear stresses it wasn't designed to carry, which can lead to fatigue failure well before the joint's expected service life. Before installing anything, check the hole diameter against the bolt, confirm adequate edge margin, and verify the mating surfaces are reasonably flat.
Step 3 — How Do You Install the Bolt and Washer?
The bolt and washer should be placed following the joint's determined stacking order, with the washer seated flat and fully flush against the mating surface before tightening begins.
A washer that's tilted, pinched, or only partially seated won't distribute load the way it's meant to, and it can actually concentrate stress on one edge rather than spreading it evenly.
Step 4 — Why Start the Nut by Hand?
Starting the nut by hand for the first few turns confirms the threads are running smoothly and prevents cross-threading before any tool force is applied.
If the nut resists turning smoothly by hand in the first few threads, stop. Don't reach for a wrench to force through the resistance — back it off, check for debris or misalignment, and confirm you have the correct thread standard before continuing.
Step 5 — Which Tool Should You Use to Tighten?
The right tool — wrench, socket, torque wrench or a controlled power tool — depends on the joint's required accuracy, and none of them should be used to force a fastener past resistance.
A basic wrench or socket is fine for low-criticality joints where exact torque isn't specified. A torque wrench becomes necessary wherever a specific clamp force matters — which, in industrial assembly, is most joints that carry load or face vibration. Power tools speed up assembly but should always be set with a torque limiter or clutch; an uncontrolled power tool applying full force past the point of resistance is one of the more reliable ways to strip threads or over-yield a bolt.
Step 6 — How Do You Apply the Correct Tightening Torque?
Correct torque depends on bolt diameter, thread pitch, strength grade, lubrication, coating, washer type, joint material and friction condition, which is why there is no single torque value that applies to every bolt.
We get asked fairly often for a general torque chart, and the honest answer is that a chart divorced from the specific bolt, coating and joint condition can do more harm than good. The correct reference is the engineering drawing, the equipment manufacturer's manual, or a verified assembly specification for that exact fastener combination.
Step 7 — How Do You Inspect the Completed Joint?
A finished joint should be checked for flush surface contact, washer position and condition, bolt alignment, thread engagement, torque compliance, and — on multi-bolt connections — correct tightening sequence.
On joints with multiple bolts — a flange, a cover plate, a mounting bracket — the sequence in which bolts are tightened matters almost as much as the torque value itself. Tightening one bolt fully before moving to the next can pull the joint unevenly and warp the mating surfaces. This is where the torque sequence for nuts bolts washers in high vibration industrial equipment becomes especially important: a proper cross-pattern or star-pattern tightening sequence, applied in stages rather than in one pass per bolt, helps the clamp load build evenly across the whole joint instead of concentrating unevenly at whichever bolt happened to be tightened first.
How Tight Should Nuts and Bolts Actually Be?
A properly tightened joint reaches the preload needed for adequate clamp force without approaching the bolt's yield strength, and tightening torque is only an indirect, friction-sensitive way of controlling that preload.
Snug-tight means the joint's surfaces are fully in contact with no gaps, before final torque is applied. From there, torque is used as a practical stand-in for preload — the actual tension inside the bolt — because measuring tension directly during assembly isn't practical on most production lines. But torque and preload aren't the same thing, and the relationship between them shifts with friction.
We often see assemblers equate a tighter joint with a safer one, when in practice the bolt's yield point is the real limit. Under-tightening leaves the joint without enough clamp force, so it can slip or separate under load. Over-tightening pushes the bolt toward or past its yield strength, which can strip threads, crush washers, or distort thin sheet material — and once a bolt has yielded, it no longer clamps the way it's supposed to, even if it looks intact. Lubrication changes this equation significantly: a lubricated or coated bolt reaches a given preload at a lower torque reading than a dry one, because less of the applied torque is being lost to friction. Any illustrative torque value mentioned anywhere in a guide like this should be treated strictly as an example — the working number always needs to come from the applicable specification, not a general reference.
How Do You Prevent Nuts and Bolts From Loosening?
Loosening is prevented by addressing its actual cause — vibration, impact, thermal cycling, settlement or insufficient preload — with a locking method matched to that specific environment, not a single universal fix.
Vibration works threads loose gradually by allowing microscopic relative motion between the nut and bolt threads. Impact loading can cause sudden, larger movements that unseat a joint in far fewer cycles. Thermal cycling expands and contracts the joint materials at different rates, which can relax clamp force even without any rotational movement. Joint settlement — where surface irregularities compress slightly under load over the first few duty cycles — reduces clamp force after the joint was originally torqued correctly. And sometimes the simplest cause is just insufficient preload from the start, leaving no margin before the joint starts to slip.
The available locking methods each answer a different piece of that puzzle: lock nuts, flange nuts, prevailing-torque nuts, thread-locking compounds, double-nut arrangements, locking plates, safety wire, mechanical retainers, and — often underrated — simply achieving correct preload in the first place.
Locking Method | Suitable Environment | Reusability | Maintenance Consideration |
Prevailing-Torque Nut | Moderate to high vibration | Limited (2–3 reuses typical) | Insert may lose grip after repeated cycles |
Flange Nut/Bolt | General vibration, wider bearing needs | Reusable | Check flange seating condition |
Thread-Locking Compound | Fine-thread, moderate vibration | Single-use typically | Requires clean, degreased threads |
Double-Nut Arrangement | High vibration, accessible joints | Reusable | Requires correct jam-nut sequence |
Locking Plate / Tab Washer | Rotational torque-out risk | Reusable if tab intact | Tab fatigue over repeated bending |
Safety Wire | Critical, low-frequency access joints | Single-use per install | Requires trained installation |
Correct Preload Alone | Where torque control is reliable | Reusable | Depends on consistent friction condition |
In our manufacturing and application experience, the correct locking method is selected against vibration frequency, temperature range, disassembly frequency and safety requirement, not chosen by default. Getting the correct washer nut bolt stacking order for vibration heavy machinery assembly right is part of this picture too — a lock washer or prevailing-torque nut installed on the wrong side of the joint, against a surface that isn't actually rotating, won't deliver the resistance it's designed for, even though it will look correctly assembled.

How Does Material and Environment Affect Fastener Selection?
Material selection depends on the strength required, the corrosion exposure expected, and whether dissimilar metals will be in contact, since the wrong combination can fail quietly through corrosion long before mechanical overload.
Why Choose Carbon Steel Fasteners?
Carbon steel fasteners are chosen for cost-effective strength and machinability, but they need a protective coating such as zinc plating and are generally limited to indoor or controlled outdoor use.
Carbon steel offers strong mechanical performance at a lower cost than most alternatives, and it machines and cold-forms well, which keeps manufacturing straightforward. Without a coating, though, it corrodes fairly readily, so zinc plating or another protective finish is the norm rather than the exception once the fastener leaves a fully controlled indoor environment.
Why Choose Stainless Steel Fasteners?
Stainless steel fasteners are chosen for corrosion resistance in damp, outdoor or food-processing environments, though corrosion resistance varies by grade and installation still needs lubrication to avoid thread galling.
Stainless steel does not mean the fastener will never rust — different grades offer meaningfully different levels of corrosion resistance, and even a high grade can develop surface staining or pitting in sufficiently aggressive conditions. Stainless fasteners are also more prone to thread galling during installation than plated carbon steel, so proper lubrication during assembly matters more here, not less.
What Happens With Dissimilar Metal Contact?
Dissimilar metals in direct contact with moisture present can set up galvanic corrosion, which is why isolation washers, compatible material pairing or protective coatings matter in mixed-metal assemblies.
When two different metals are in electrical contact with moisture as the electrolyte, the more anodic metal corrodes preferentially — sometimes quite quickly. This is a common oversight when a stainless bolt is used to fasten an aluminum bracket, for example. Isolation washers, choosing compatible metal pairings, or applying a protective coating between the two materials are the standard mitigations.
How Do Temperature and Chemicals Affect Fasteners?
Temperature swings, chemical exposure and UV/weather cycling affect coating durability and washer material choice, which is why the application environment should shape material selection as much as load does.
A fastener specified purely against mechanical load, without considering its operating environment, can still underperform. Repeated thermal cycling stresses coatings and can loosen preload over time even without vibration; chemical exposure degrades certain coatings and elastomeric washer materials faster than others; and UV and weather cycling outdoors affect plastic or rubber washer components more than metal ones. Our engineering team evaluates coating and base material together against the stated operating environment before confirming a specification, rather than treating material choice and environment as separate decisions. If your project involves outdoor exposure, moisture, or mixed metals, sending your application details to [email protected] is a practical way to get that reviewed before you commit to a material.
What Mistakes Commonly Happen During Installation?
Most fastener failures trace back to a small set of repeated mistakes — mismatched threads, wrong washer placement, guesswork torque, and ignoring vibration or corrosion — each of which is preventable with a specific correction.
1. Matching diameter only, skipping pitch check — leads to thread damage; verify pitch and standard before assembly.
2. Mixing metric and inch threads — causes cross-threading and stripped threads; confirm the standard against the drawing.
3. Using the wrong washer size or hardness — crushes the washer or creates uneven load; size the washer to the load and bearing need.
4. Placing the washer on the wrong side — damages the surface and creates a false sense of locking; place it against the rotating element.
5. Starting the nut crooked — produces a cross-threaded joint; always hand-start the first few turns.
6. Reusing damaged or corroded fasteners — leads to premature failure; inspect and discard based on condition, not convenience.
7. Tightening entirely by feel — produces inconsistent preload; use a calibrated torque tool where a spec exists.
8. Assuming tighter is always safer — risks yield and thread stripping; follow the specified torque or preload value.
9. Ignoring vibration, impact or thermal cycling — invites self-loosening; select a locking method matched to the actual environment.
10. Ignoring dissimilar metal contact — sets up galvanic corrosion; isolate or match materials appropriately.
11. Reusing locking devices beyond their reuse limit — reduces locking performance; follow the manufacturer's reuse guidance.
12. Ignoring the correct multi-bolt tightening sequence — causes uneven clamp force and a warped joint; follow the specified tightening pattern.
How Should You Inspect and Maintain Fastener Joints Over Time?
Maintaining a bolted joint means periodically checking for loosening, corrosion, cracking, wear and washer displacement, and re-torquing or replacing fasteners according to specification rather than assuming every fastener is reusable indefinitely.
Position or torque marking paint lines can help flag movement at a glance, but they're an aid for a technician's inspection routine, not a substitute for it. A mark that's still aligned doesn't guarantee the joint is still at spec — it only means it hasn't visibly rotated. Fasteners with stripped threads, heavy corrosion, or permanent deformation should be replaced rather than reused, and for critical equipment, keeping maintenance records with batch traceability makes it far easier to identify a pattern if a particular batch or fastener type starts showing early wear across multiple units.
Where Are Nuts, Bolts and Washers Used in Industrial Equipment?
The right combination of nut, bolt and washer changes across electrical cabinets, machinery structures, transportation equipment and outdoor systems, because each environment carries a different vibration, load and corrosion profile.
Electrical cabinets and control panels typically see light static loads, but grounding and electrical bonding requirements matter, so plated steel or stainless fasteners paired with tooth or insulating washers are common choices, with maintenance focused on connection integrity rather than heavy load checks.
Automation equipment and machinery structures deal with cyclic vibration and higher clamp force demands, which usually calls for alloy or stainless bolts paired with spring or prevailing-torque locking methods, and periodic re-torque checks as part of scheduled maintenance.
Transportation equipment faces continuous vibration alongside thermal cycling, which pushes toward higher-grade bolts and more robust locking approaches like mechanical retainers or double-nut arrangements, since access for maintenance can be limited once the equipment is in service.
Outdoor and energy storage systems contend with weather and moisture exposure as the dominant risk, favoring stainless or well-coated carbon steel fasteners with sealing washers, and a maintenance schedule built around corrosion checks rather than just torque verification.
Food-processing machinery adds washdown cycles and chemical exposure into the mix, which generally rules out uncoated carbon steel entirely in favor of stainless fasteners with smooth, easily cleanable washer geometry.
ForndLock Precision Fasteners
How Do You Get Custom Nuts, Bolts and Washers From ForndLock?
We manufacture nuts, bolts and washers to drawings and samples, supporting both metric and inch thread standards. That includes non-standard diameters, lengths and pitches when a project calls for something outside a standard catalog size — which, in our experience, happens more often in industrial equipment design than people expect once tolerances, clearances or mounting geometry get specific.
We work across carbon steel, stainless steel and other materials suited to the application, along with a range of surface treatments depending on the environment the fastener will actually see in service. Where a project needs a matched strength grade across the bolt, nut and washer, we evaluate that pairing against the stated load rather than assuming a default combination. We also produce special washer geometries — sealing, insulating, or custom bearing-area designs — when a standard washer doesn't fit the joint's actual requirement.
Our process typically moves from drawing review to sample confirmation before scaling into volume production, so any fit or spec issue gets caught before a full production run rather than after.
ForndLock: Your Trusted Partner in Industrial Hardware
If you're sourcing fasteners for equipment, cabinets, machinery structures or a custom project, it helps us respond with a useful answer if you include the drawing, thread standard, nominal diameter, thread pitch, bolt length, nut type, washer dimensions, material, strength grade, surface treatment, application environment and expected order quantity.
Correct use of nuts, bolts and washers is never just a question of stacking order. A reliable joint depends on thread compatibility, matched material and strength grade, a washer chosen for what the joint actually needs, controlled preload, and a locking approach suited to the vibration, temperature and corrosion conditions the equipment will actually face. Skipping any one of those checks tends to show up later — sometimes as a slow rattle, sometimes as a joint that fails all at once.
For critical industrial connections, the safest approach is to verify against the engineering drawing, the assembly specification, and the real operating conditions of the equipment, rather than relying on a general rule of thumb pulled from a different application.
If you're currently selecting nuts, bolts or washers for industrial equipment, control cabinets, machinery structures or a custom assembly, send your drawing, thread specification, material requirements, application environment and expected quantity to [email protected]. We can help evaluate fastener sizing, material and surface treatment options, and the right stack-up for your joint, and support you from sample confirmation through volume production.